Collars do more than serve a functional purpose in customized clothing—they define a garment’s style and complement the wearer’s features. A neatly stitched collar can elevate a simple design, while a poorly executed one undermines even careful craftsmanship. Research shows 92% of those who wear handcrafted clothing value the personalized details, and collars often top that list. This guide breaks down Customized clothing: Common methods of sewing collars, covering everything from basics to advanced skills for sewists at any level.
1.Collar Fundamentals for Custom Apparel
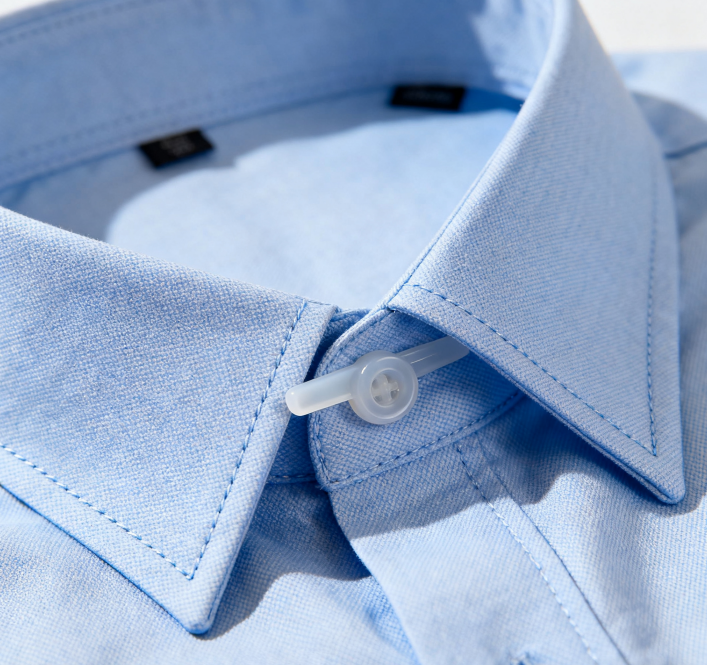
Key Collar Styles: Different collar styles call for distinct sewing techniques. Peter Pan collars, with their soft rounded edges, work well for children’s apparel or women’s blouses in lightweight fabrics like chiffon or linen, focus on achieving smooth, even curves. Stand-Up collars add structure to coats and shirts, so they require sturdy interfacing to hold their shape. Classic Shirt collars, with sharp points, are a business wear staple; opt for crisp fabrics like poplin or oxford cloth and prioritize clean, defined tips. Shawl collars, which drape softly and widely, suit coats and dresses in materials like cashmere or velvet, relying on the fabric’s natural flow. Notched collars, recognizable by their V-shaped cutout, fit blazers and jackets best, precision in aligning the collar points is key. Knowing these custom collar styles helps you pick the right design for each project.
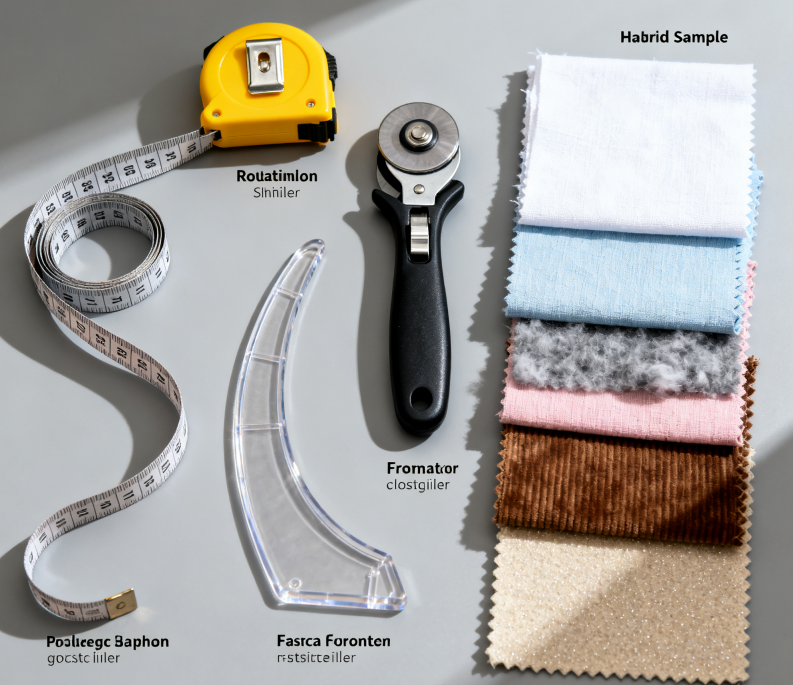
Essential Tools & Materials: Good tools and materials lay the groundwork for successful collar sewing. Essential tools include a high-precision measuring tape for accurate sizing, a rotary cutter with a self-healing mat for clean cuts, a French curve for drafting smooth neckline and collar shapes, and a sewing machine with a walking foot to prevent fabric shifting. For materials, match the fabric to the collar style: shirt collars need medium-weight, crisp fabrics, while Shawl collars require drapable options. Interfacing, woven for breathability, non-woven for stiffness, fusible for ease, adds structure. Always test how fabric and interfacing work together first. These collar sewing tools and custom apparel materials set you up for success.
2.Common Sewing Methods for Custom Collars
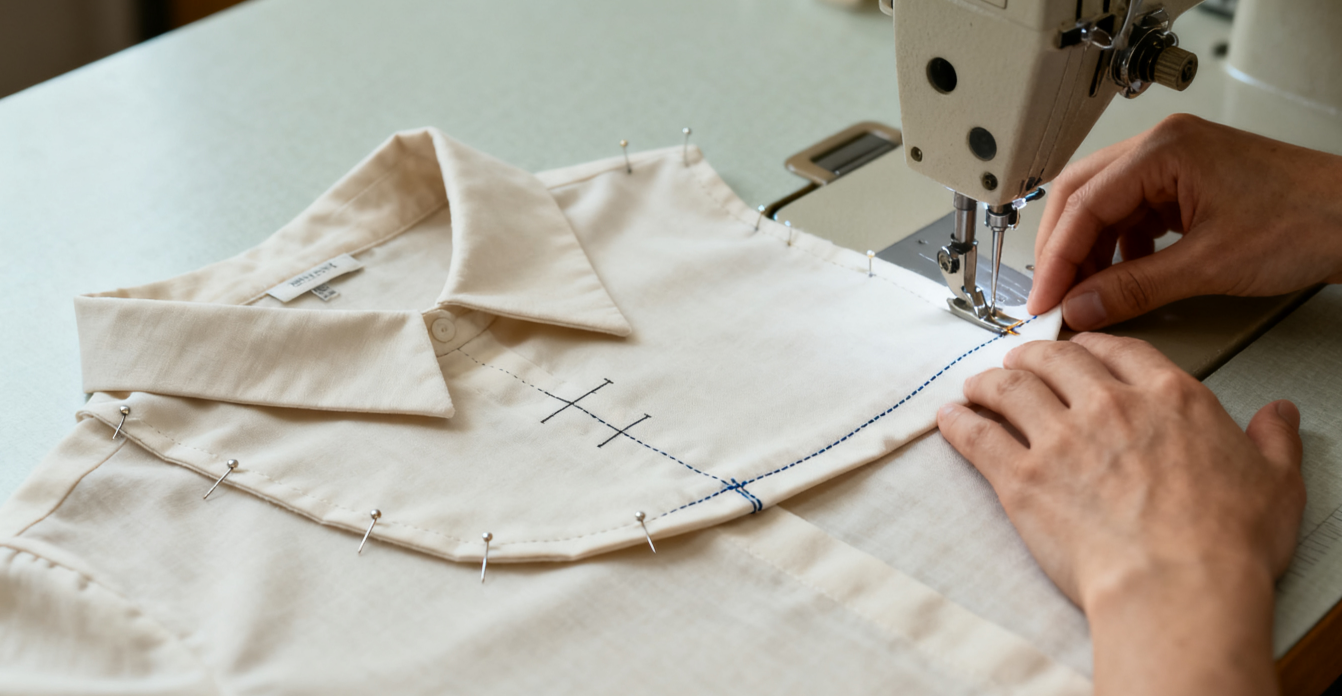
Method 1: Flat Collar Construction. Flat collars are great for beginners. Here’s how to make them: First, draft a pattern with 1/2-inch seam allowances—keep curves smooth for Peter Pan collars and extend edges for Shawl collars. Next, cut two fabric pieces and one interfacing piece, then fuse the interfacing to one fabric piece. Sew the outer edges, leaving the neckline edge open, and clip curves on Peter Pan collars to help them lay flat. Turn the collar right side out and press it smooth. Finally, pin the collar to the garment’s neckline, matching center back and shoulder marks, sew with a 3mm stitch, and press the seam. This creates polished custom Peter Pan or Shawl collars.
Method 2: Stand-Up Collar Assembly. For structured Stand-Up collars, follow these steps: Draft a collar stand pattern, 1.5 inches high at the back, tapering to 0.75 inches at the front with 1/2-inch seam allowances. Cut two pieces, fuse interfacing to one, then sew the top and outer edges. Trim seams and clip curves to reduce bulk. Turn the stand right side out and press. Mark alignment points on both the stand and the garment’s neckline, then pin them evenly. Sew the stand to the neckline with a 3mm stitch, trim the seam, and press it toward the stand. Finish with a blind hem or edge stitching for a clean look. Mastering stand-up collar sewing adds a professional touch to any garment.
Method 3: Classic Shirt Collar Tailoring. To make crisp Shirt collars: Start with collar stays, plastic or resin pieces, inserted into the points. Fuse interfacing to the collar pieces, then place the stays between the layers. Sew the upper and lower collars, gently pulling the upper collar to create a slight curve. Trim seams and clip curves. Align the collar’s center back with the shirt’s, extend the front edges 1 inch past the placket, and mark buttonhole positions. Turn the collar right side out, press to sharpen the points, and use steam to set the fold line. This results in a sharp custom button-up collar.
3.Tips for Perfect Collars
Fabric Specific Adjustments: Adjust your approach based on the fabric. For lightweight silk or chiffon, trim interfacing 1/8 inch from seams to reduce bulk, use fine needle, and polyester thread. Stretchy fabrics like jersey or spandex need elastic interfacing, stretch stitches, and a 10% stretch allowance when attaching the collar. Heavyweight wool or denim works best with woven interfacing, bias-cut collar pieces, and heavy needles. Customized clothing: Common methods of sewing collars always adapts to the material.
Troubleshooting Common Issues: Fix common collar issues with these tips: Puckered necklines happen from fabric shifting, use more pins or basting, trim seams to 0.3 inches, and steam press. Blunt points come from insufficient clipping, clip seams every 1/4 inch, use a point turner to shape tips, then hot press. Ill-fitting stands stem from pattern curves, reduce steepness for gaps, increase for tightness, and test on scrap fabric first. These collar sewing troubleshooting steps ensure smooth results.
4.Conclusion
Sewing custom collars balances precision and creativity. Every step, from picking the style to fixing small issues, impacts the final look. With practice, you’ll create customized clothing collars that are both functional and stylish. Taking time to master perfect collar sewing will lift all your custom projects, grab your tools and start on your next collar today!
Post time: Oct-14-2025


